
Joel & I bought our first house in Michigan in 2000. It was still decorated as the mother of the previous owner had designed it. We pulled up ALL of the carpet in the 900 sq ft, 3 bedroom house...we ripped ALL the wallpaper from the walls, the closet doors, the window sills...we painted over the pink/peach/green walls. We knocked out a wall, built a deck complete with benches & planters and put ceramic tile in the kitchen. It was a great starter home & we had fun testing out our fixer-upper skills. I have a complete scrapbook of before/after pictures, if you're interested. :)
My point is that this isn't our first rodeo for DIY projects, but I am over the moon excited about what we've done to our kitchen in our current home. When we bought this house 7 1/2 years ago, the kitchen had yellow flowered wallpaper on the walls, faux brick linoleum floor, and dark brown cabinets with some 70s style "decorative" hardware that served no practical purpose. I knew I would need to fix the hot mess when we put our offer on the house, but I was 7 months pregnant with an almost 2 yr old at home so I wasn't in a position to do a ton of work on it. Then, as you know, next came cancer, another pregnancy with another baby in the house, then another cancer diagnosis, so many years passed before we got serious about making the changes.
In November 2010 we started with knocking out the wall between the kitchen & the dining room, thanks to a brother-in-law in need of anger therapy.
 |
| Brown/white wall is dining room & green is kitchen. All one room now! Note the UGLY decorative handles in the middle of the cabinet doors... |
We replaced the old faux brick & the carpet from the dining room.
 |
| On a budget, I found a beautiful piece of vinyl flooring & we used the driveway to cut it to fit the room exactly.
TA-DA!
|
 |
| Kitchen Complete--Dec 2010: No more door handles, new floor, no wall, all new lighting fixtures... So the overall plan was to get rid of the ugly floor & knock out the wall to make it a bigger space for our family of 5. Mission was accomplished on the budget we had at the time. BUT...I knew I would eventually want to change those cabinets & counters...so enter KITCHEN UPDATE 2012!!! |
I had a "vision" of what I wanted my kitchen to look like...someday. We played around with some ideas, I googled "counter top redo" and "painting counter tops"--we're still on a budget here & couldn't afford to replace anything. THEN, I began my relationship with Pinterest. I will share the details of my secret love affair with this site in a future entry.
I wanted lighter cabinets & we did paint our cabinets in our first home, but if I did white cabinets, then I didn't want white counters. And painting counters...really? I also didn't like that little 3D decorative *touch* to my cabinet doors in the middle. So.....here's what we did....
After we took off all the doors, Joel popped that 3D part off (they were simply nailed on). Then we bought sheets of wainscoting from the hardware store. He cut them to fit inside each door.

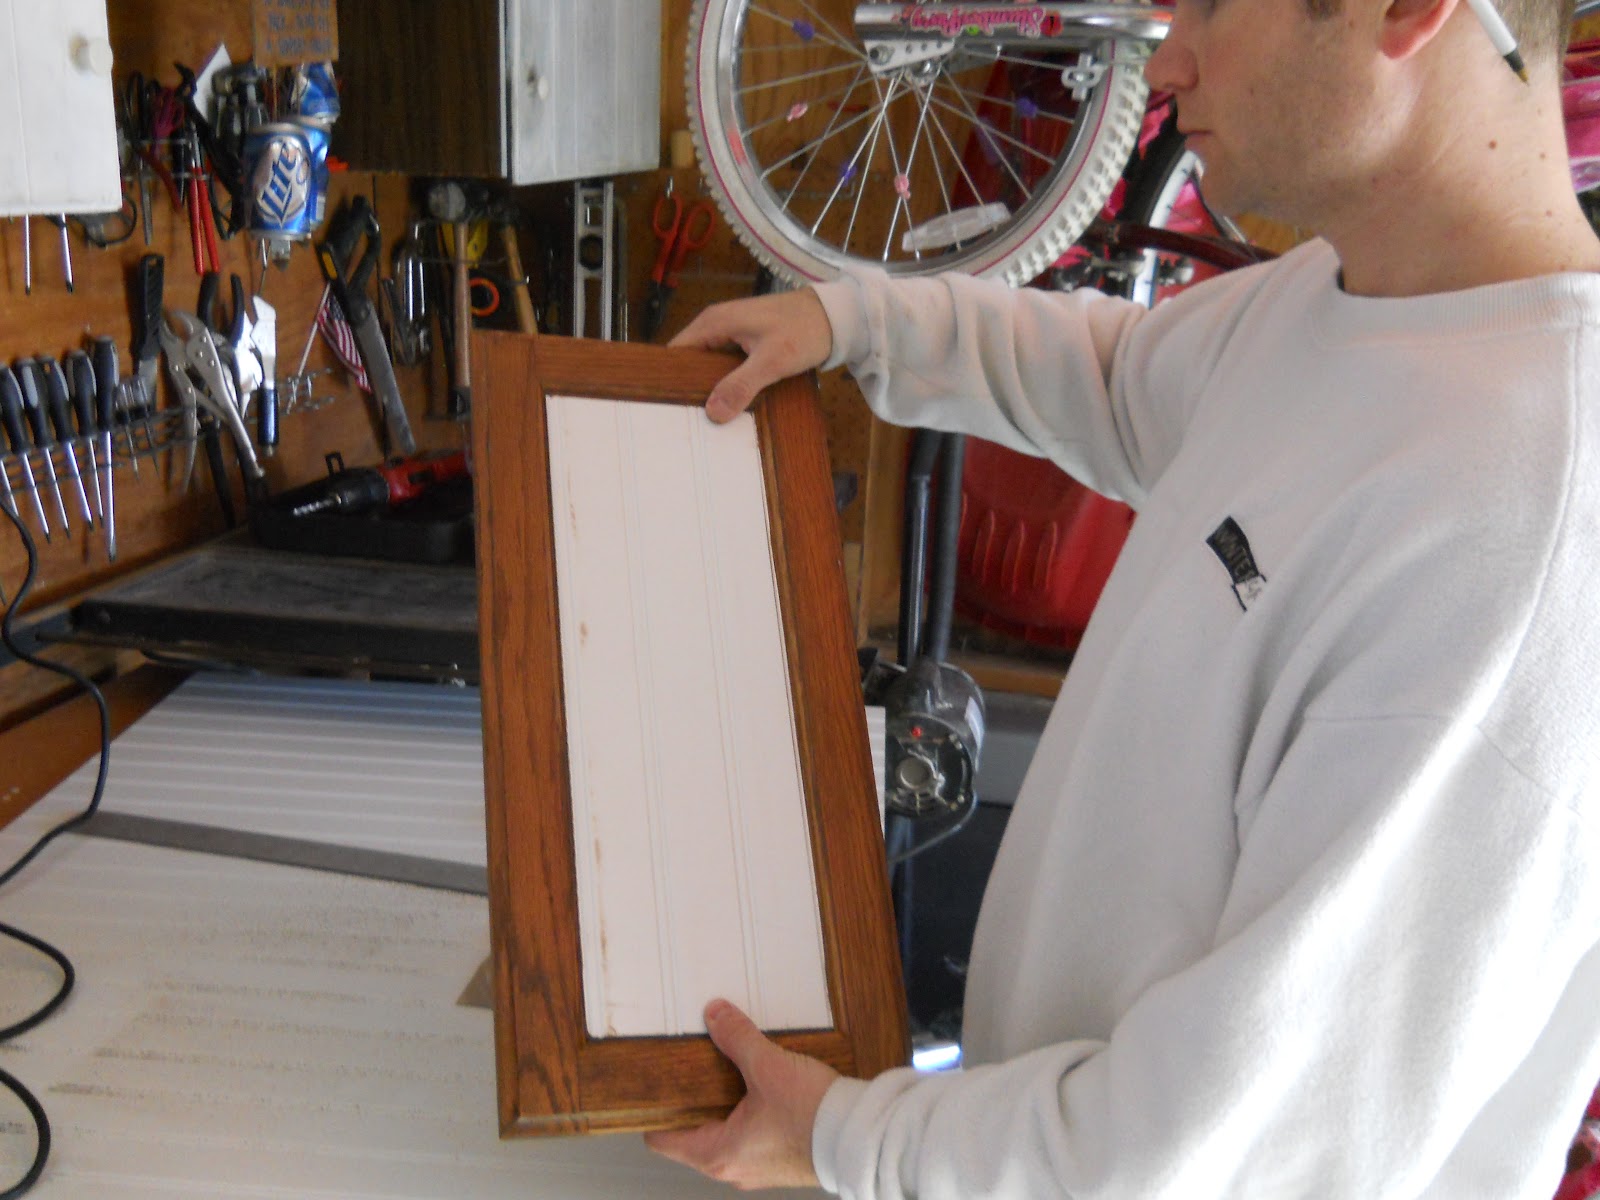
Then he caulked around the insert, we primed & painted. Took a trip to hardware store for new handles & our new cabinets were born!
Next challenge was the counter tops. I first thought about doing this to my counter tops but had a hard time finding a granite design that wouldn't "compete" with my floor. So instead, I ran across this blogger and decided spray paint was the ticket for me!
When I explained to Joel what I was going to do, he didn't even bother questioning me--we had this discussion during the first part of the kitchen make-over when I decided I wanted to spray paint our fridge. Yep, it was white before--now it's black to match all the OTHER black appliances in our kitchen. It's not flawless, but I cover it with so much junk anyway, it works perfectly for our family!
 |
| Cover anything you DON'T want painted & prime the counters. |
 |
| First couple of coats. |
 |
| 8 cans later--about 5 total coats. |
 |
| Adding first clear coat top. |
Here's where I have some advice for those who might consider this method.
#1 We used a stone finish spray paint which gave me EXACTLY the look I wanted, but I had NO idea how much it would take to get the coverage I wanted. One can did not even come close to putting a full layer on our very small counter top. It took 8 cans to get our desired look
#2 Just because you're using CLEAR paint doesn't mean it's easy--or unable to mess it up :/ Don't forget to stir before EVERY application. It WILL leave a foggy look on your counter if it's not stirred & that can make you VERY grouchy.
#3 If you use a stone finish spray and choose NOT to sand between each application of clear coat, don't expect a completely smooth finish. **Note, we started sanding between coats after the 3rd coat & I don't know that it made a big difference, but we still have some texture after 8 coats & it's PERFECT, just not what we expected.
#4 If you DO get stone spray on anything not meant to be spray painted, wipe it immediately. While you can touch up over the color, you will have a more difficult time removing the texture if you wait for it to dry.
.jpg) |
| 5 coats of brown stone paint + 8 coats of clear poly acrylic top coat = beauty! |
I also purchased an island--which is a WHOLE different drama in itself, but thanks to the advice of my remote designer, C, I waited until we decided on one to match the paint color for the cabinets. I think it turned out amazing!
.jpg)
.jpg)
We're waiting one more week to let the clear coat completely cure before we put anything back on the counters, but I was too excited to wait to post the pics. Let me know what you think!!
Amazing! It is beautiful. I cant wait to see it in person! :) (vicky)
ReplyDelete